Goal
In this tutorial, we are teach how to replace photodiodes and LEDs when the optical density traces don’t look ideal.
Why?
So why would the parts be variable? Well mainly because we are using inexpensive parts for eVOLVER Smart Sleeves, which ends up being great due to the affordability and accessibility to tinker with/ redesign. The disadvantage comes with the potential for variable behavior of some parts. Sometimes, after calibration, we will notice that parts installed aren’t optimal and we need to replace them.
For example, the following OD trace is non-ideal: How do we fix it?

Parts Needed
- Photodiode: LTR-323DB
- IR LED: 160-1061-ND
- Small flat head screw driver (For screw terminals)
- Soldering Iron, desoldering wick, solder (for any soldered parts)
Tutorial
1) Locating LED/ Photodiodes
Typically, there is one IR LED and two IR photodiode in each setup. The two photodiodes collect light at different angles, resulting in much better dynamic range. When the calibration curve looks noisy (like shown above) the most likely fix is to switch out the photodiode. Sometimes, but more rarely, the LED is the culprit.

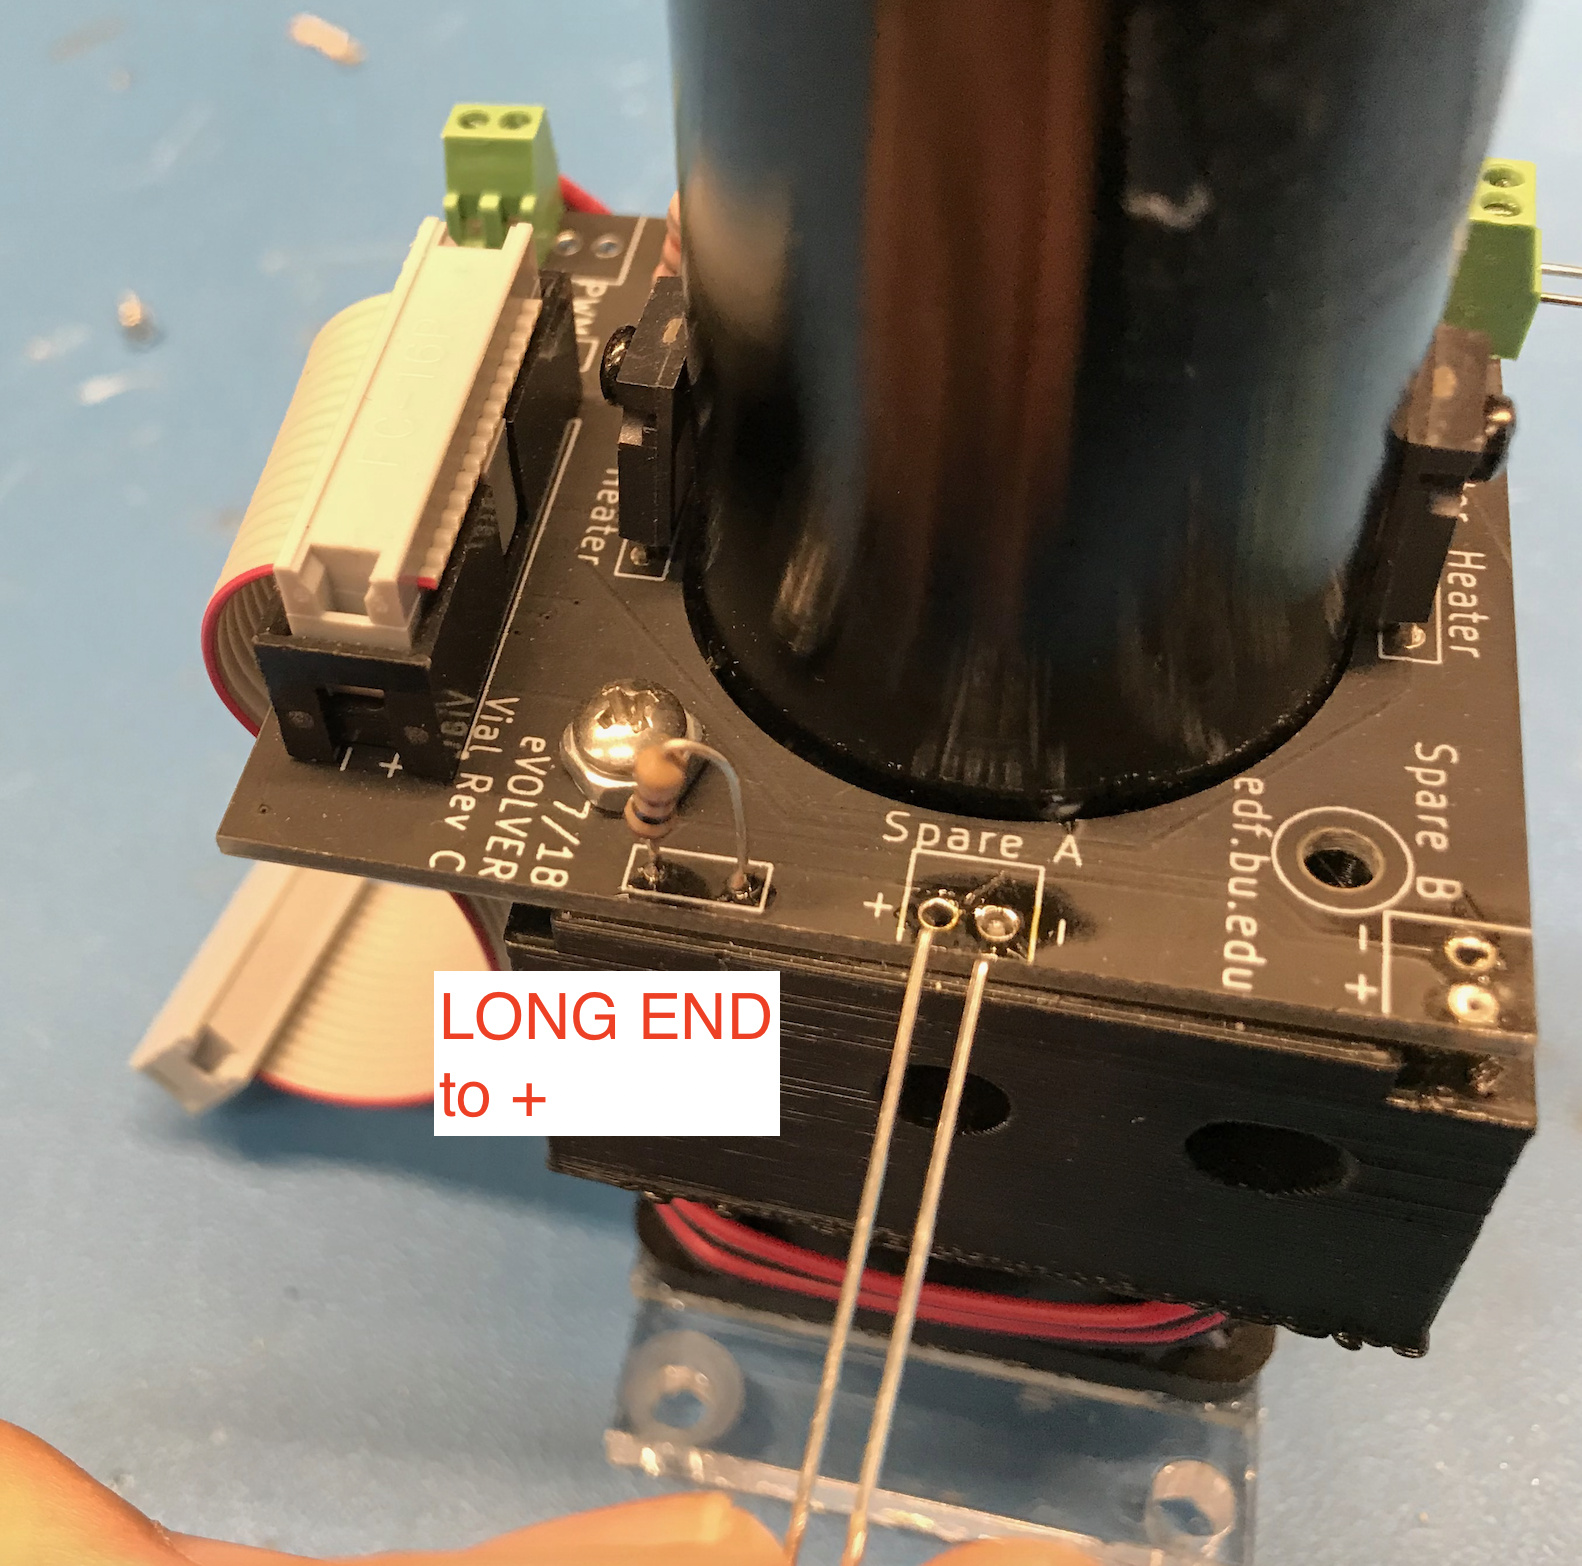
2) Switching out screw terminal parts (IR LED, 90 Degree Photodiode)
To switch out any parts that are mounted via screw terminal, it is very simple and straight forward. You can simply unscrew the part with the small screw driver and replace the part. Make sure that the LONG END goes to PWR (+).
IR LED


IR Photodiode


3) Switching out soldered parts (135 Degree Photodiode)
Dealing with soldered parts are more work but still fairly easy. If you need a quick tutorial on soldering, please refer to this nice guide from Sparkfun.
Generally, I like to use a solder wick. If you heat up the solder next to the wick, the solder will be “soaked up” and wicked away. See pictures below.

4) Insert photodiodes/LEDs back into the slot
Make sure the diodes are back into the 5 mm holes. Don’t insert the diode too deeply into the 3D printed part. This may obstruct the glass vessel.
That’s it! Plug it back into eVOLVER and recalibrate the sleeve!