Summary
In this tutorial, we will go over how to set up a local NETGEAR router to properly connect to eVOLVER. In this setup, the eVOLVER is not directly connected to the internet. If you desire the eVOLVER to be connected directly to the internet, please consult your organization’s IT professional. The lab computer will still be connected to the internet via WiFi or a secondary Ethernet Port
NOTE: You can use any router available but I am using a NETGEAR router as an example because I am most familiar.
This tutorial includes the following steps:
- Connecting the Ethernet Cables (eVOLVER <-> Router <-> Lab Computer)
- Configuring the local NETGEAR router
- Connecting the lab computer to the internet
1. Connect eVOLVER and Lab Computer to Router via Ethernet Cables
Why do we need a router?
The “brain” of the eVOLVER consists of a Raspberry Pi that interfaces with the lab computer/ server. A Raspberry Pi is a small credit card sized computer, that typically runs a version of Linux. The Raspberry Pi receives commands typically via the Ethernet connection that are then forwarded to the appropriate Arduino micro-controller. By using this architecture, it means that one computer is able to communicate with many eVOLVER systems on the same router network, making it significantly more scalable.
Connecting the Router
In this tutorial, we are using the N300 NETGEAR router, an inexpensive $30 router. First connect two Ethernet cables to any of the LAN inputs. DO NOT CONNECT TO INTERNET PORT. Universities or companies typically block additional routers plugged into the network. Again, this setup is for the basic eVOLVER connection, without any internet connection.


2. Power on eVOLVER (5V) and Router and go to the router login portal (http://192.168.1.1)
Choose to manually set the router settings

3. Configure router admin settings
Record the password somewhere. You will use these configurations when you assign static IPs or check eVOLVER connections.

4. After setting up the Admin Account, reload the login portal (http://192.168.1.1)
You should see the following.

5. Click on Attached Devices and verify connections
There should be two devices attached to the system: the lab computer and the eVOLVER (Raspberry Pi).

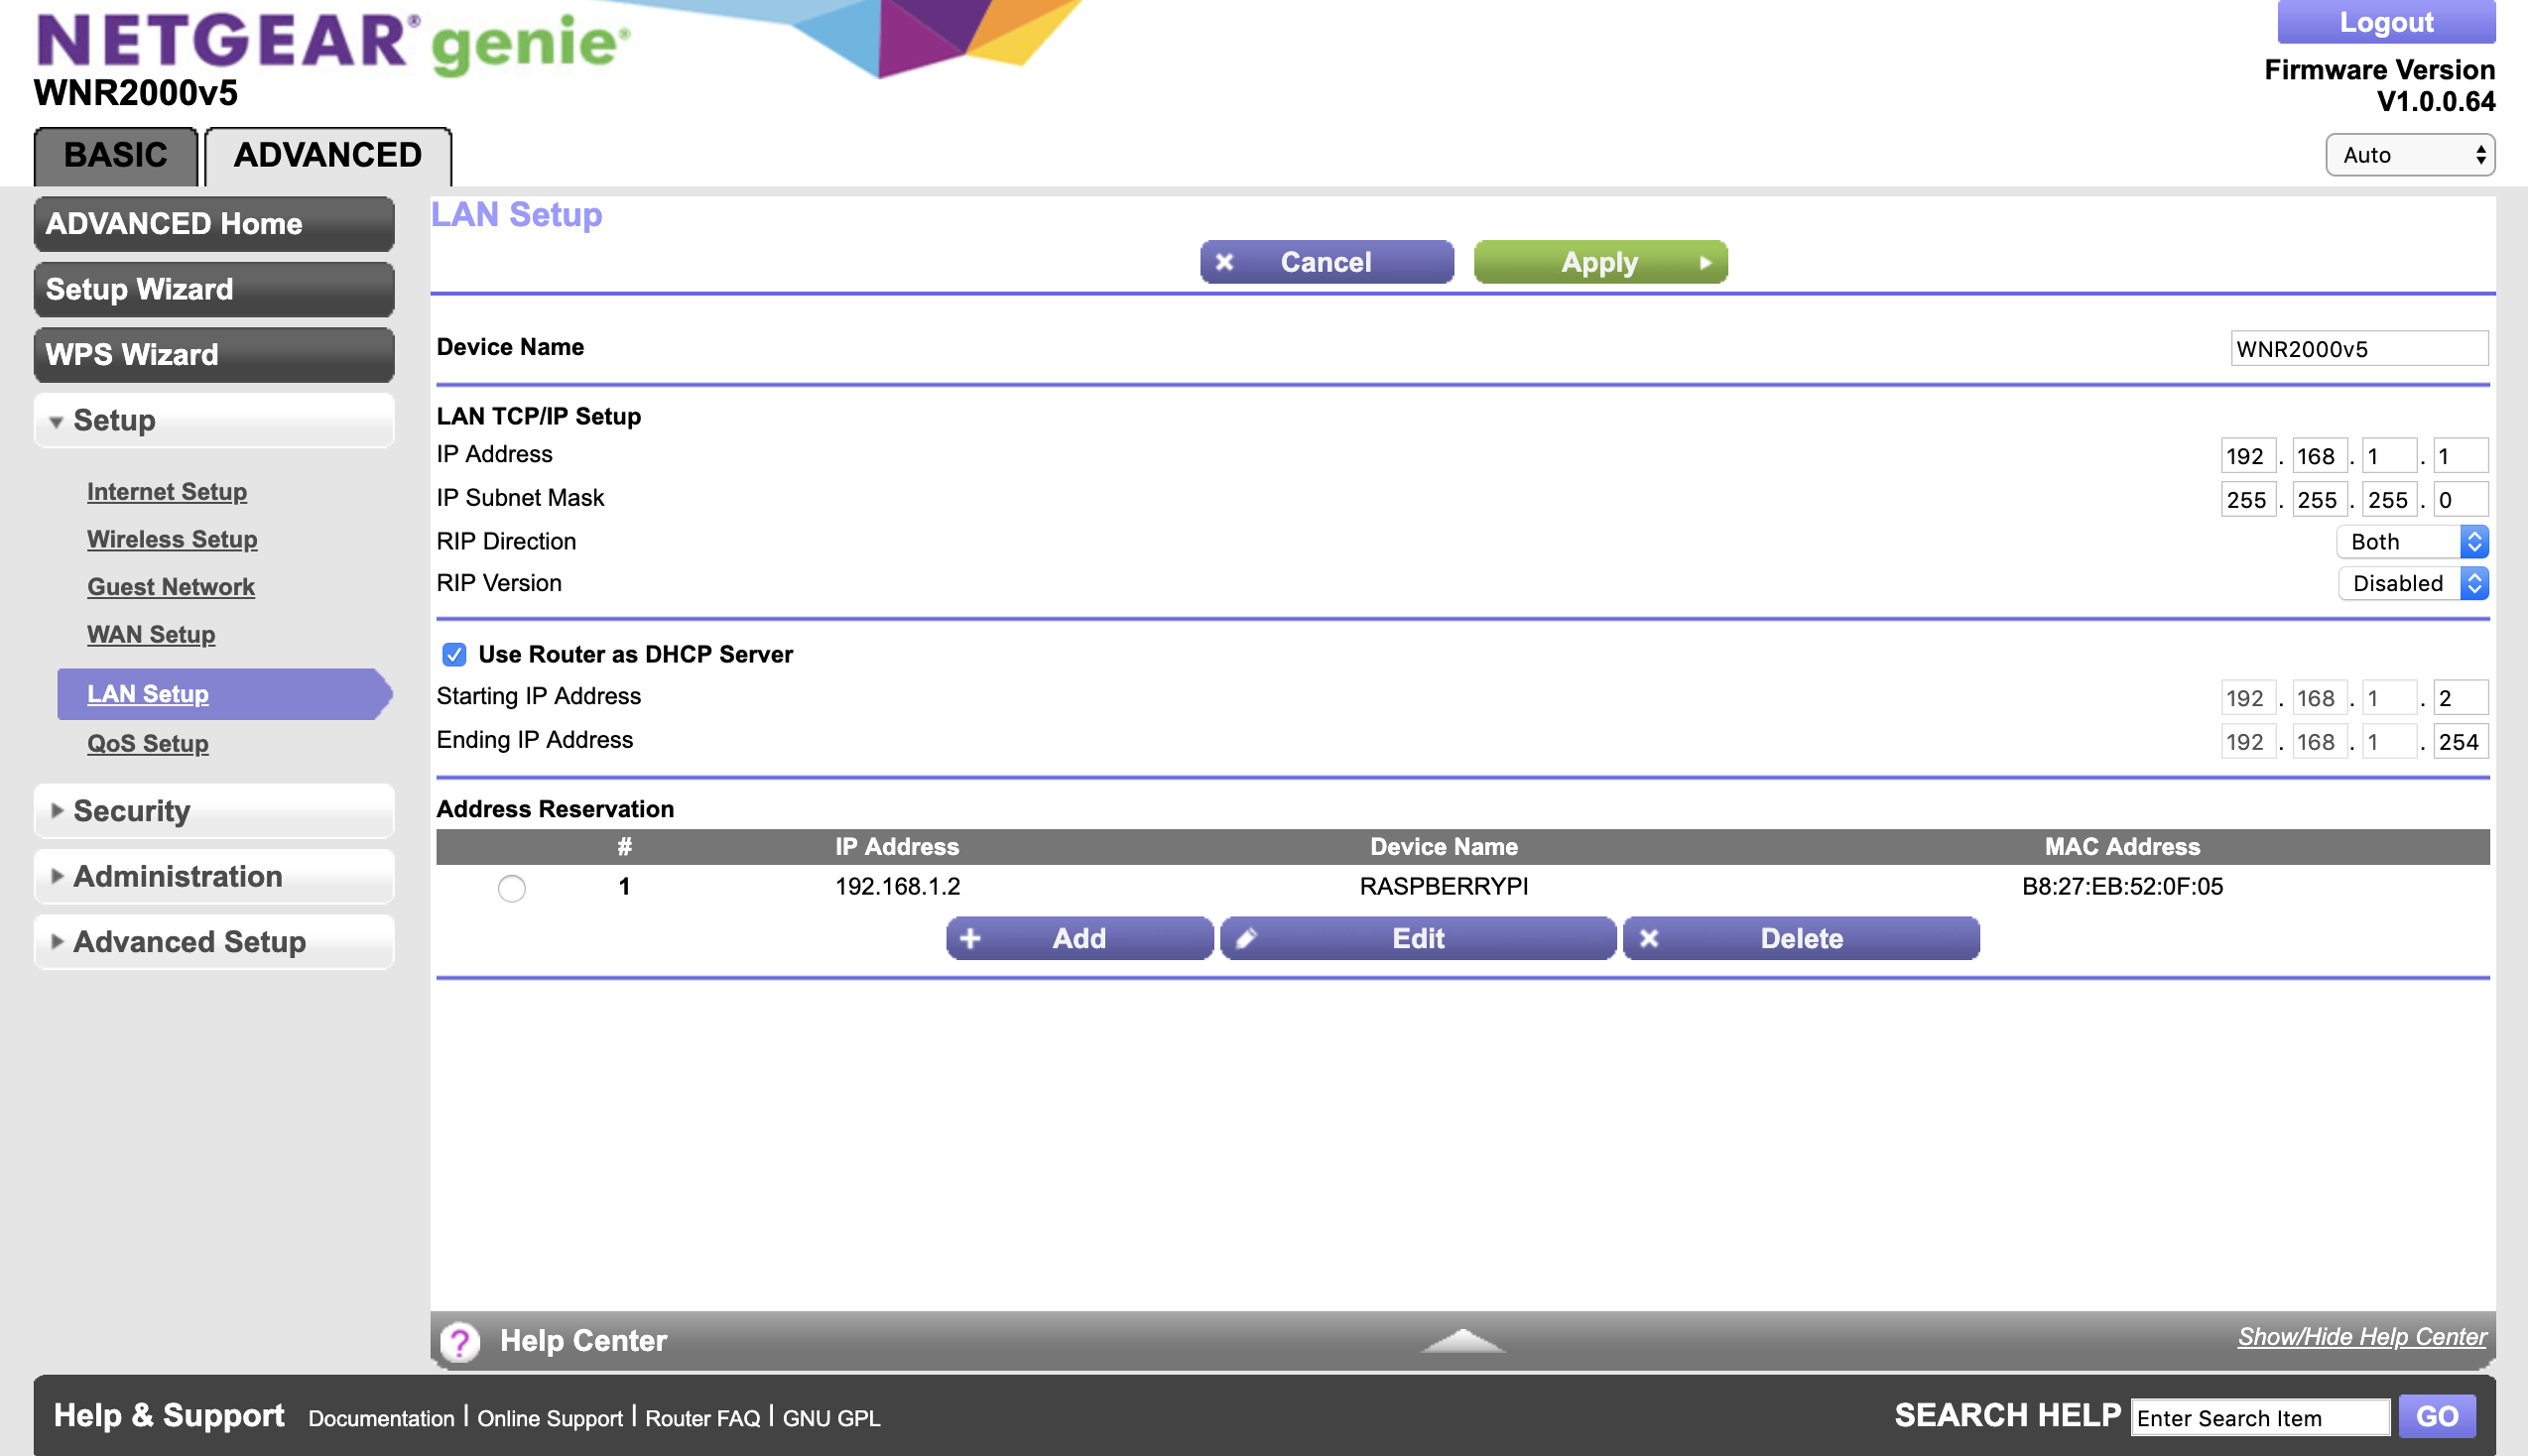
6. Click Advanced > Setup > Lan Setup

6. Click Add, select the Raspberry Pi/ eVOLVER Radio Button and click Add
7. Modify the desired static IP address (right below the Address Reservation button table) to 192.168.1.2 (or your desired IP address)

6. Click Add, verify Address Reservations, and click Apply
The router will disconnect and restart before the IP addresses are properly assigned.
7. Power cycle the eVOLVER Vial Platform and verify the IP address was properly assigned on the Home Screen of the eVOLVER Touchscreen

8. Set service priority on lab computer to be able to use the lab computer properly, with internet.
I will give this example with OSX. Please consult this tutorial to properly do the same with Windows.
9. On OSX, go to System Preferences > Network.

10. Select Set Service Order and drag the appropriate connect to the top
This would most convieniently be either WiFi or a secondary Ethernet Cable. Machines without either could use a USB <-> Ethernet dongle.

10. You should be connected to both the internet and eVOLVER now from the lab computer.
Verify this by going to Terminal or Powershell and typing:
ping 192.168.1.2
If the connection doesn’t timeout and you can still browse the internet, you are set!
Bonus Information:
This is the simpliest way to configure eVOLVER to talk to a lab computer. This is easy to setup because you don’t have to go through IT. If you want to go through IT, you are connecting eVOLVER directly to your internet router. For security purposes, make sure to consult your IT specialist to configure the eVOLVER to prevent public access to it.
